Video Tutorial
Our video editor Gavin Steele has created this video tutorial to compliment this text + image tutorial.Preparation
First thing you will need to do to create this effect is find some nice paint splatter/spray brushes. For this particular piece I used brushes from Brusheezy: 842-Splatter. You’ll also need an image to apply this to. In this case, I shot this image myself.Step 1
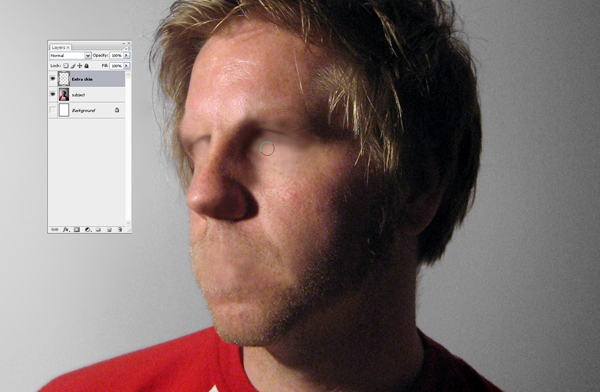
Copy the background and paste it onto a new layer. Rename the new layer Subject and turn the background layer to white.Create a new layer labeled “Extra Skin.” Then using the Clone Tool, Alt-click on other parts of the face that best match the color of skin you want to copy. I suggest using a soft brush to blur out the edges.
For this I usually just play around with the Cloning Tool until I get close to something that looks right. This may take some experimentation, as you have to pay close attention to the light source in the photograph. To see a more in-depth tutorial on the cloning tool you can visit this page on Psdtuts+.
Step 2
Once we have covered all the facial features, select the “Extra Skin” layer and the "Subject" layer, then press Command + Alt + E on to merge the layers into a new layer. Rename this layer “Faceless Subject.”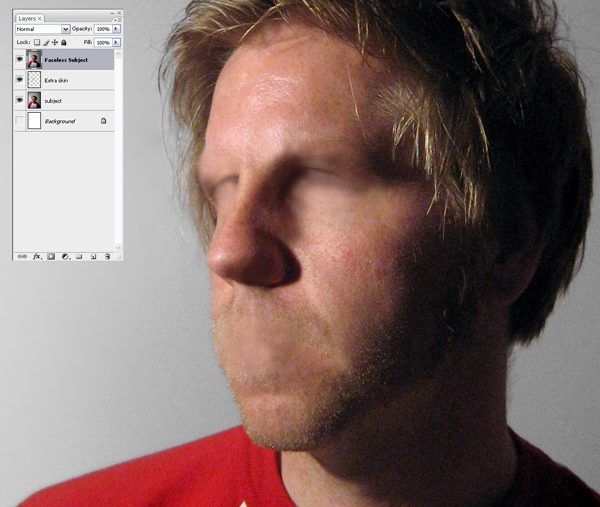
Step 3
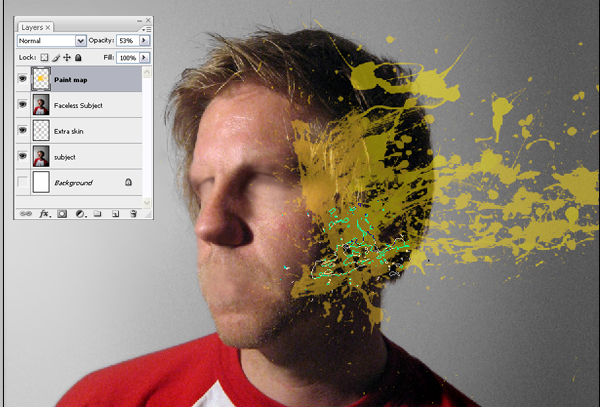
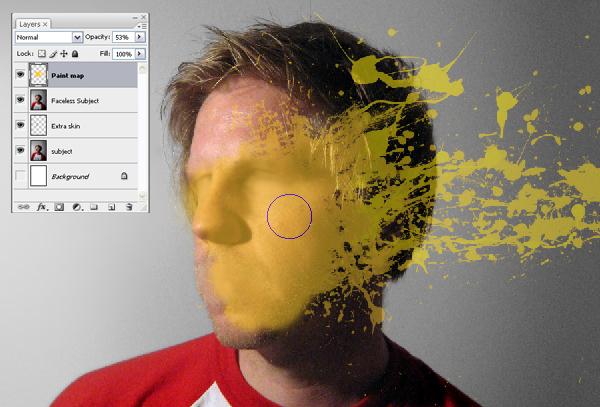
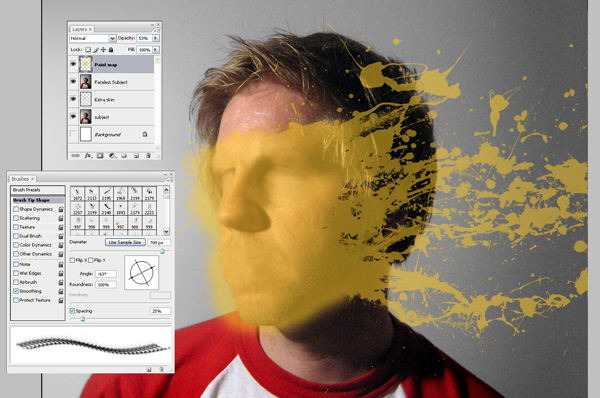
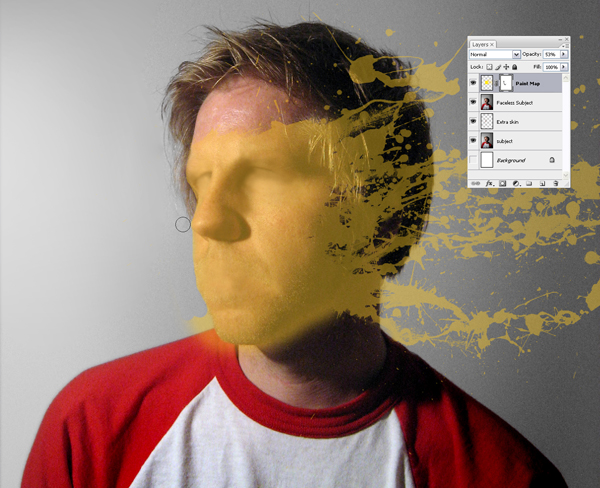
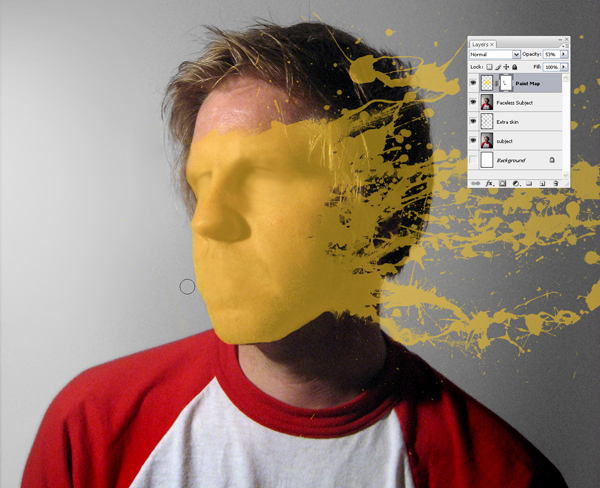
Now we can start building our paint splatter area. Create a new layer and call it “Paint map.” Select the Brush Tool and start to paint out the area you want the paint splat to appear in. This is where your paint splatter/spray brushes will come in handy.It doesn’t matter what color you use; here I have chosen yellow (#ffc924). It also helps to lower the opacity of this layer so that you can better line up the splats over the subject’s face.
Make sure that you only paint where you want the splatter to occur, you may have to paint/mask/erase a bunch to get a nice paint splatter. Take your time with this Step; it may be the most important one of the process.
Step 4
Once completed you will want to get rid of any layer masks by right-clicking on the “Paint map” layer and selecting Convert To Smart Object. After that, change the layer style of the “Paint Map” layer to Overlay. You should now have something that looks similar to the picture below; keep in mind that no two paint splatters will be exactly the same.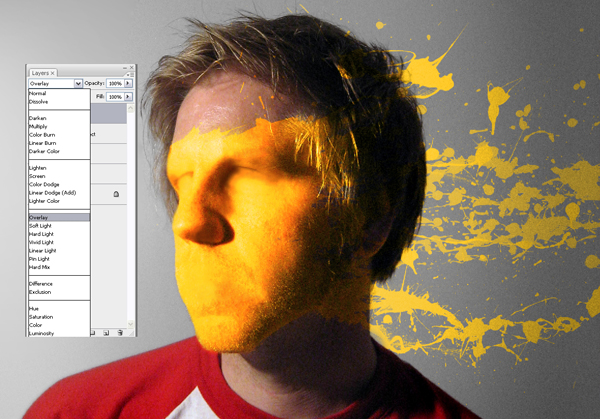
Step 5
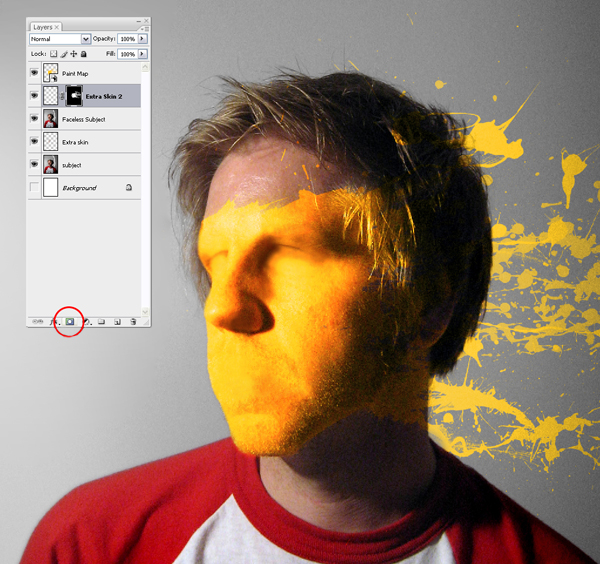
Next create a new layer under the “Paint map” layer, and name this layer “Extra Skin 2.” With this layer selected Command-click the "Paint map" layer to select the paint splat you have created. Next click on the Add Layer Mask button at the bottom of the layers palette.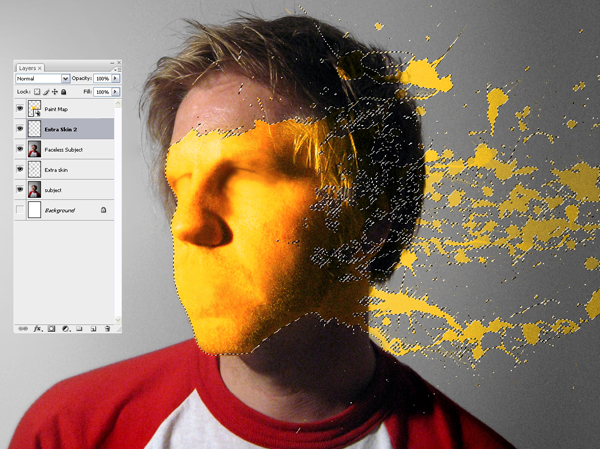
0 komentar:
Post a Comment
Mohon Saran dan Komentarnya